Authentication
To use the Delivery Tracker APIs, you must authenticate in one of two ways
Method 1. API Key (Recommended)
Step 1. Import Credentials from the Delivery Tracker Console.
Get the project's Credentials from the Delivery Tracker Console.
To learn how to create a project and create credentials, see [Create credentials using the Console] (#create-credentials) at the bottom of this article.
Step 2. Send an access token to the API.
Use the Access Token obtained in Step 2 to call the API you want to use as shown below.
Request
POST https://apis.tracker.delivery/graphql
Authorization: TRACKQL-API-KEY [YOUR_CLIENT_ID]:[YOUR_CLIENT_SECRET]
Content-Type: application/json

{"query": "query AuthTestQuery { carriers(first: 10) { edges { node { id name } } } }"}
Request Header 의 [YOUR_CLIENT_ID], [YOUR_CLIENT_SECRET] 를 Console 을 사용하여 Credentials 생성을 통해 획득한 Client Id, Client Secret로 대체하여야 합니다.
Client IDs registered before 2024-05-13 cannot be used as API keys, only the oauth2 method is available. Create new Credentials to use your API Key.
Method 2. OAuth2 Access Token
Step 1. Import Credentials from the Delivery Tracker Console.
Get the project's Credentials from the Delivery Tracker Console.
To learn how to create a project and create credentials, see [Create credentials using the Console] (#create-credentials) at the bottom of this article.
Step 2. Get an access token from the Delivery Tracker authentication server.
The Delivery Tracker authentication server is compliant with the OAuth 2.0 Client Credentials standard.
Using the Credentials information obtained in Step 1, generate an Access Token by sending an HTTP request as follows.
Request
POST https://auth.tracker.delivery/oauth2/token
Content-Type: application/x-www-form-urlencoded

grant_type=client_credentials&client_id=[YOUR_CLIENT_ID]&client_secret=[YOUR_CLIENT_SECRET]
Replace [YOUR_CLIENT_ID], [YOUR_CLIENT_SECRET] in the Request Body with Credentials information (Client ID, Client Secret).
Response
{
  "access_token": "[YOUR_ACCESS_TOKEN]",
  ...
}
Step 3. Send an access token to the API.
Use the Access Token obtained in Step 2 to call the API you want to use as shown below.
Request
POST https://apis.tracker.delivery/graphql
Authorization: Bearer [YOUR_ACCESS_TOKEN]
Content-Type: application/json

{"query": "query AuthTestQuery { carriers(first: 10) { edges { node { id name } } } }"}
Replace [YOUR_ACCESS_TOKEN] in the Request Header with the Access Token obtained through Step 2.
Step 4. Renew the access token if necessary.
If the Access Token has expired, the API response will throw an error like this
The HTTP Response Status Code is irrelevant and should be checked for errors in the Request Body.
{
  "errors": [
    ...,
    {
      "extensions": { "code": "UNAUTHENTICATED" }
    },
    ...
  ]
}
If you receive an UNAUTHENTICATED error as shown above, you'll need to go through Step 2 to get an Access Token again.
For more information on error handling, see the documentation Error Handling.
Appendix. Create Credentials using the Console
This part covers how to create Credentials for Delivery Tracker authentication.
Step 1. Creating a project in the Console
Step 1-1. Connect to the console.
Access the Delivery Tracker Console.
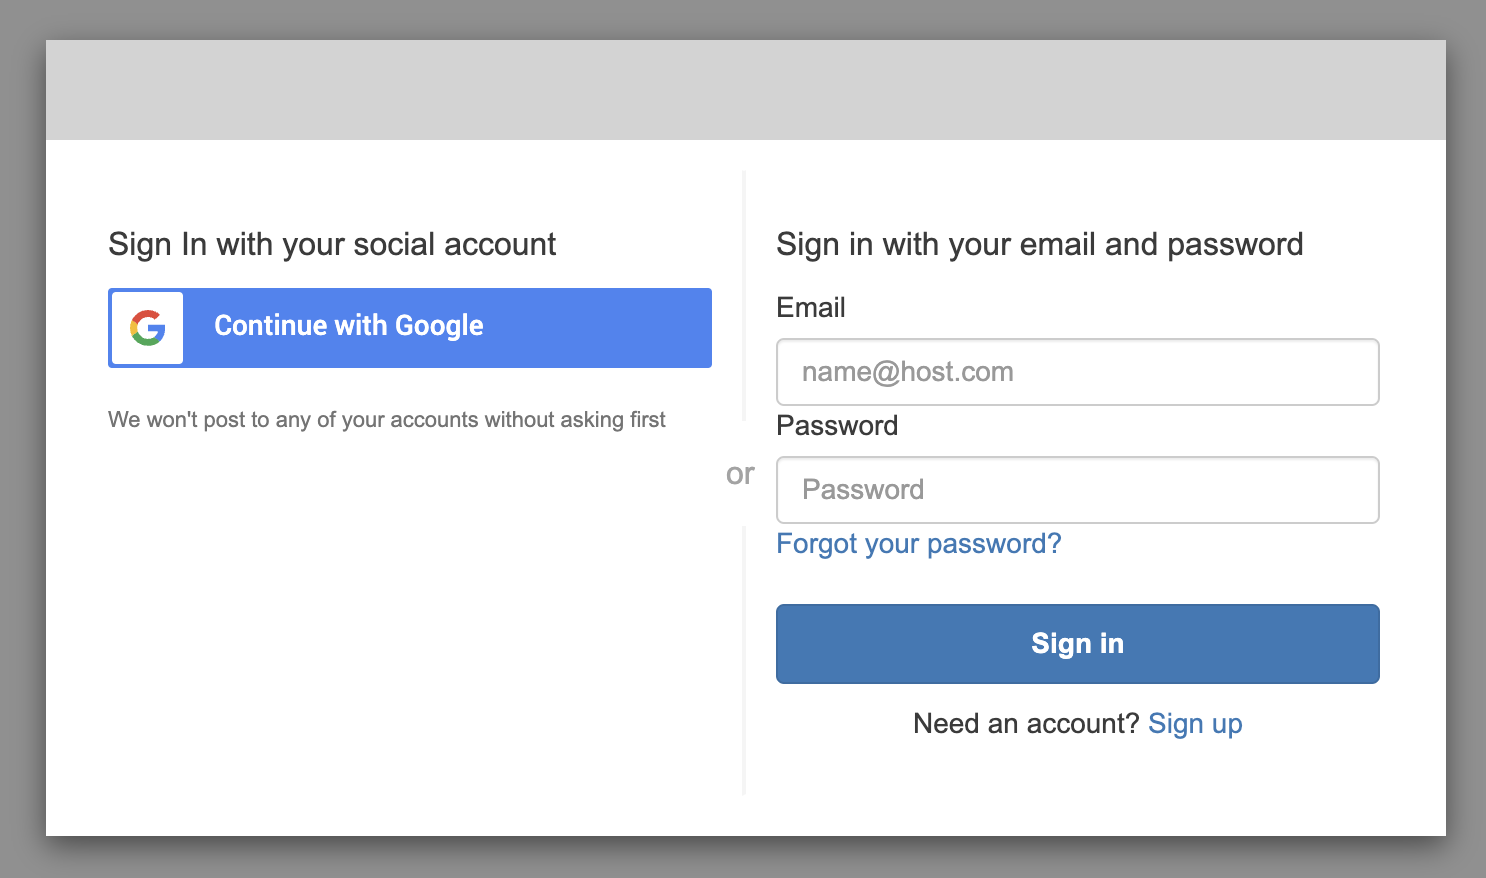
Step 1-2. Sign up and sign in to the console.
Sign up and log in to the console with your Google account or Email.
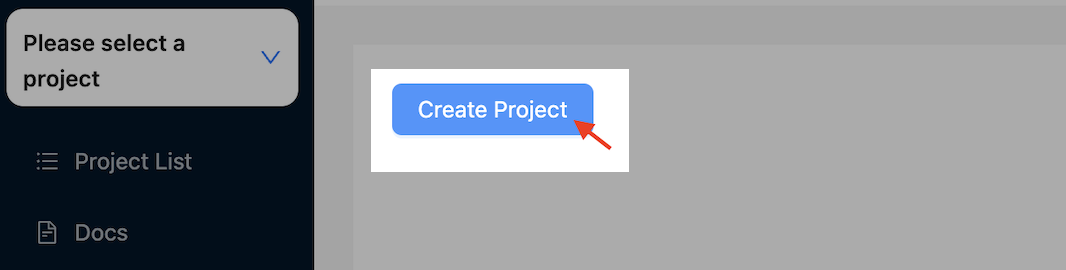
Step 1-3. Create a project.
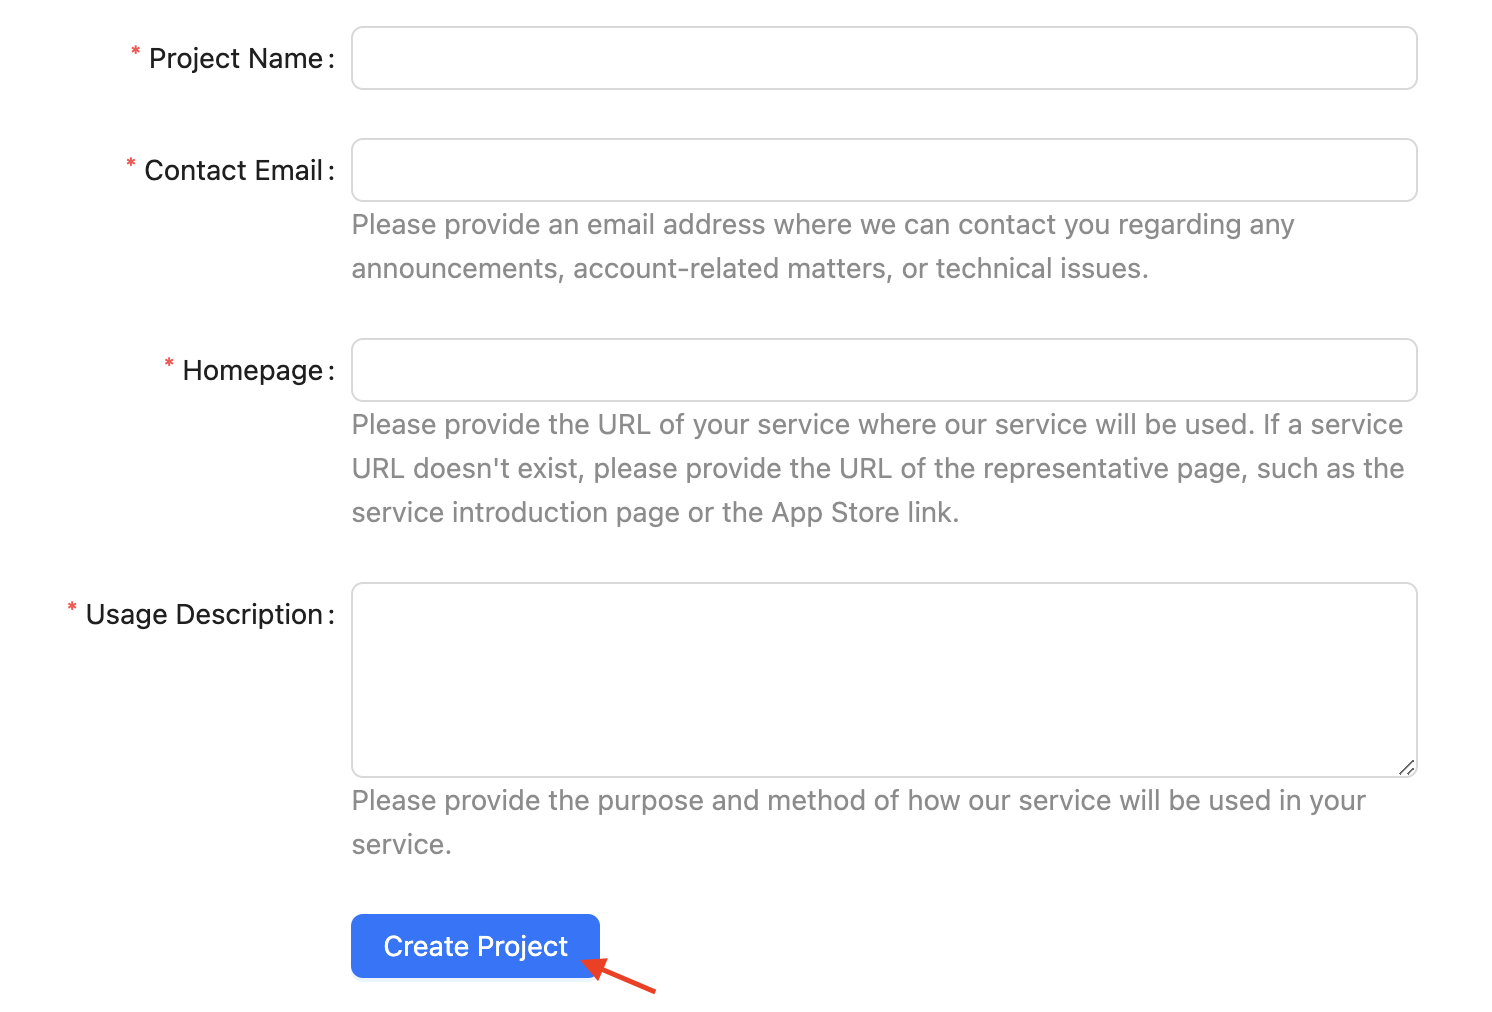
After logging in, click the "Create Project" button on the project list page to go to the project creation page.
Then enter the project information and click the "Create Project" button to create the project and go to the created project page.
Step 2. Create credentials in the console
Step 2-1. Select a project.
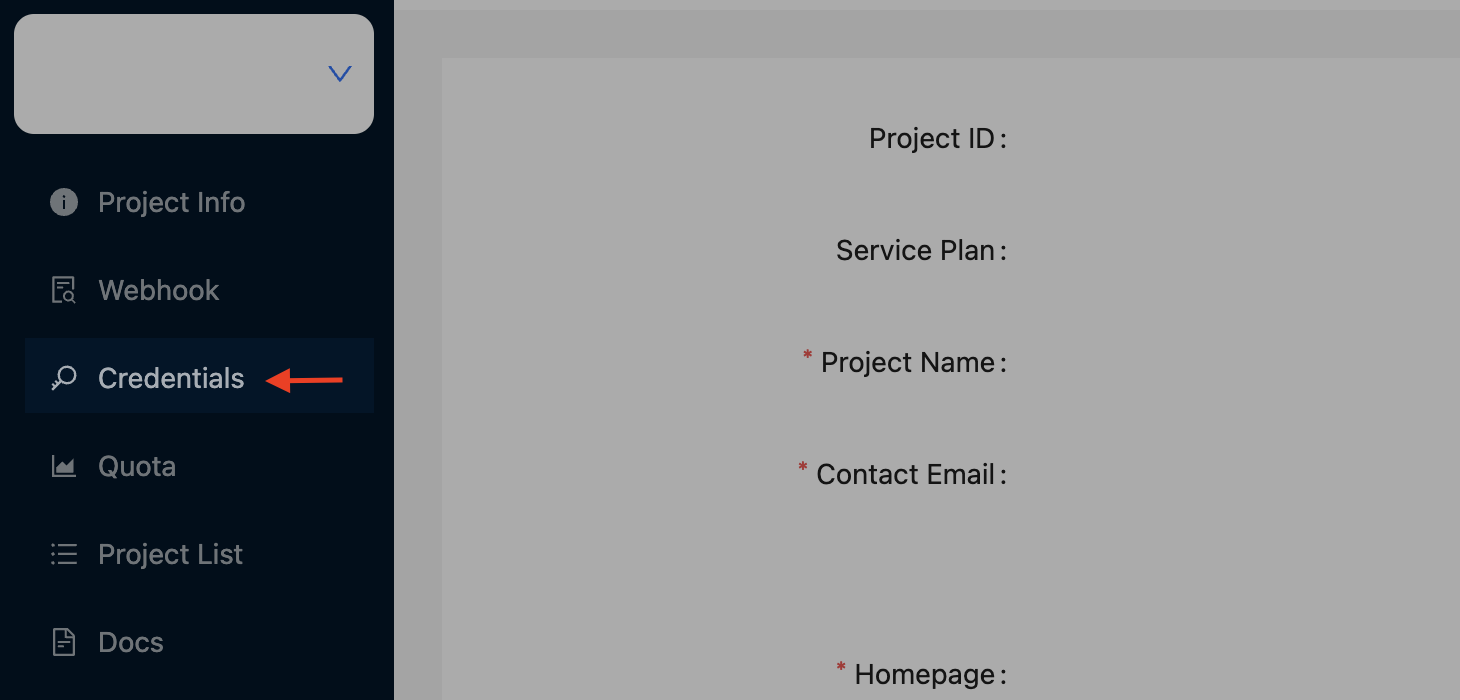
On the "Project List" page, click the project you want to create credentials for to go to the project page.
**Step 2-2. Create Credentials
On the project page, click "Credentials" in the left menu to go to the Credentials list page.
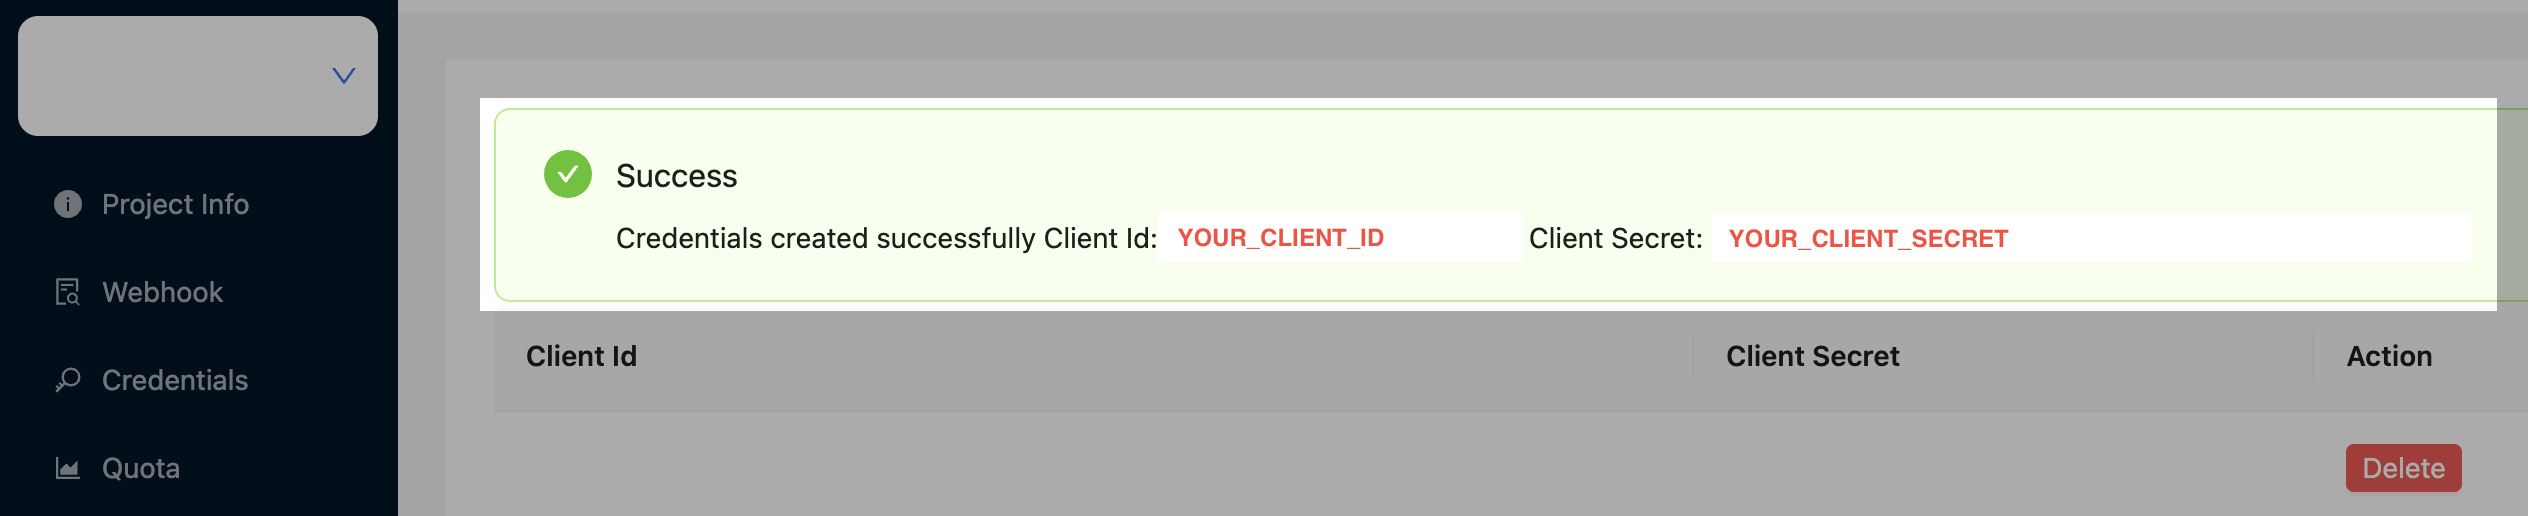
Then click the "Create Credentials" button present on the Credentials list page to create the credentials.
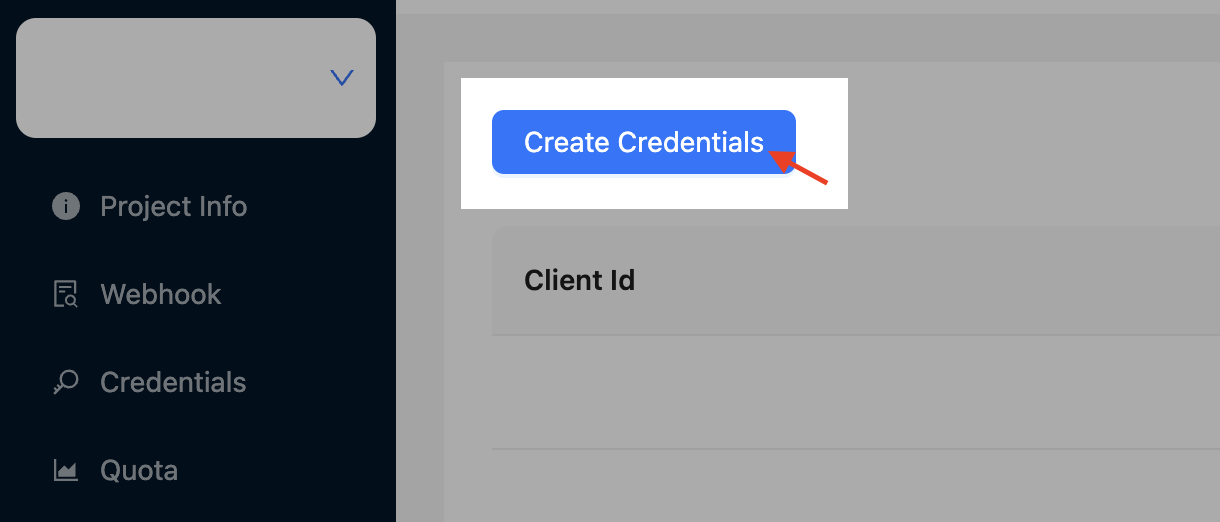
Please check the generated "Client Id" and "Client Secret". This information will be used in the "Basic steps" part at the top of this article.
"Client Secret" 의 경우 외부에 노출되지 않도록 주의가 필요하며, 발급된 이후 재조회가 불가능 합니다.
If the Client Secret is lost, it cannot be retrieved and new Credentials must be issued and used.